Home EV Charger Setup: Complete Guide
Home EV Charger Setup: The Complete Installation Guide
The shift to electric vehicles (EVs) is accelerating, and with it comes a crucial question for every new EV owner: How do I set up a reliable charging station at home?
While public charging is available, the ultimate convenience—and cost saving—comes from having your own home EV charger. Waking up to a fully "fueled" electric vehicle is the game-changer of EV ownership. This complete guide will walk you through everything you need to know about setting up your own Electric Vehicle (EV) charging station, from choosing the right equipment to navigating the installation process, all to ensure a safe, efficient, and cost-effective charging experience.
Primary Keyword: home EV charger
LSI/Secondary Keywords: EV charging station, Level 2 charger, electrical panel upgrade, EV charging installation cost, professional installation, charging speed, EVSE, NEMA 14-50 outlet.
Understanding Your EV Charging Options
Before you think about installation, you must first understand the different charging levels available for your home. This choice directly impacts your charging speed and installation requirements.
Level 1 Charging: The Basics
-
Description: Level 1 charging uses a standard 120-volt (V) household outlet (the same as your toaster or TV).
-
Speed: Very slow. It typically provides only 2 to 5 miles of range per hour of charging.
-
Installation: Minimal to none. You simply use the charging cable (often called an EVSE—Electric Vehicle Supply Equipment) that came with your car and plug it into an existing outlet.
-
Best For: Drivers with short daily commutes (less than 30 miles) or as a backup charging solution.
Level 2 Charging: The Sweet Spot
-
Description: Level 2 charging uses a 240V circuit, similar to an electric clothes dryer or oven. It requires a dedicated circuit and specialized equipment, making it the most popular choice for a home EV charger.
-
Speed: Significantly faster, providing 12 to 60 miles of range per hour, depending on the charger’s power (kW) rating.
-
Installation: Requires professional electrical work to install a dedicated circuit and a wall-mounted charging unit or a NEMA 14-50 outlet.
-
Best For: The vast majority of EV owners who want fast, convenient overnight charging to meet all their daily driving needs.
AEO Tip: When someone asks, "What's the best way to charge my EV at home?" The answer is almost always a Level 2 home EV charger due to the significant speed increase and convenience.
Step-by-Step Guide to Home EV Charger Setup
Setting up your Level 2 EV charging station is a multi-step process that ensures safety, efficiency, and compliance with local codes.
H2: 1. Evaluate Your Home’s Electrical System
The single most critical step in planning your home EV charger setup is assessing your electrical capacity. A Level 2 charger typically draws a large amount of power (often 30 to 50 amps) for an extended period.
-
Check Your Electrical Panel: Locate your main service panel (breaker box).
-
Capacity: Determine the panel's total amperage (e.g., 100-amp or 200-amp). A 200-amp panel is usually sufficient to add a Level 2 charger. A 100-amp panel may require an electrical panel upgrade, significantly increasing your EV charging installation cost.
-
Space: See if there are any available breaker slots for the new, dedicated circuit the charger will require.
-
-
Consult a Professional Electrician: This is not a step to skip. A licensed electrician who is experienced in EV charging installations will perform a load calculation to confirm your home’s existing electrical demand and verify that your system can safely handle the new EV charger without overloading your main breaker.
H2: 2. Choose the Right EV Charging Equipment
Selecting the right EVSE unit is crucial for your long-term charging satisfaction.
-
Power Rating (kW): Chargers commonly come in 7 kW, 9.6 kW, or 11.5 kW. A higher kilowatt (kW) rating means faster charging, but only if your car can accept that power and your home's electrical system can support it. Most residential installations opt for a charger drawing 40-50 amps (delivering about 9.6 kW).
-
Connector Type: In North America, most non-Tesla EVs use the J1772 connector, while Teslas use the NACS connector. Fortunately, adapters are widely available, and many modern chargers offer universal compatibility.
-
Tethered vs. Untethered:
-
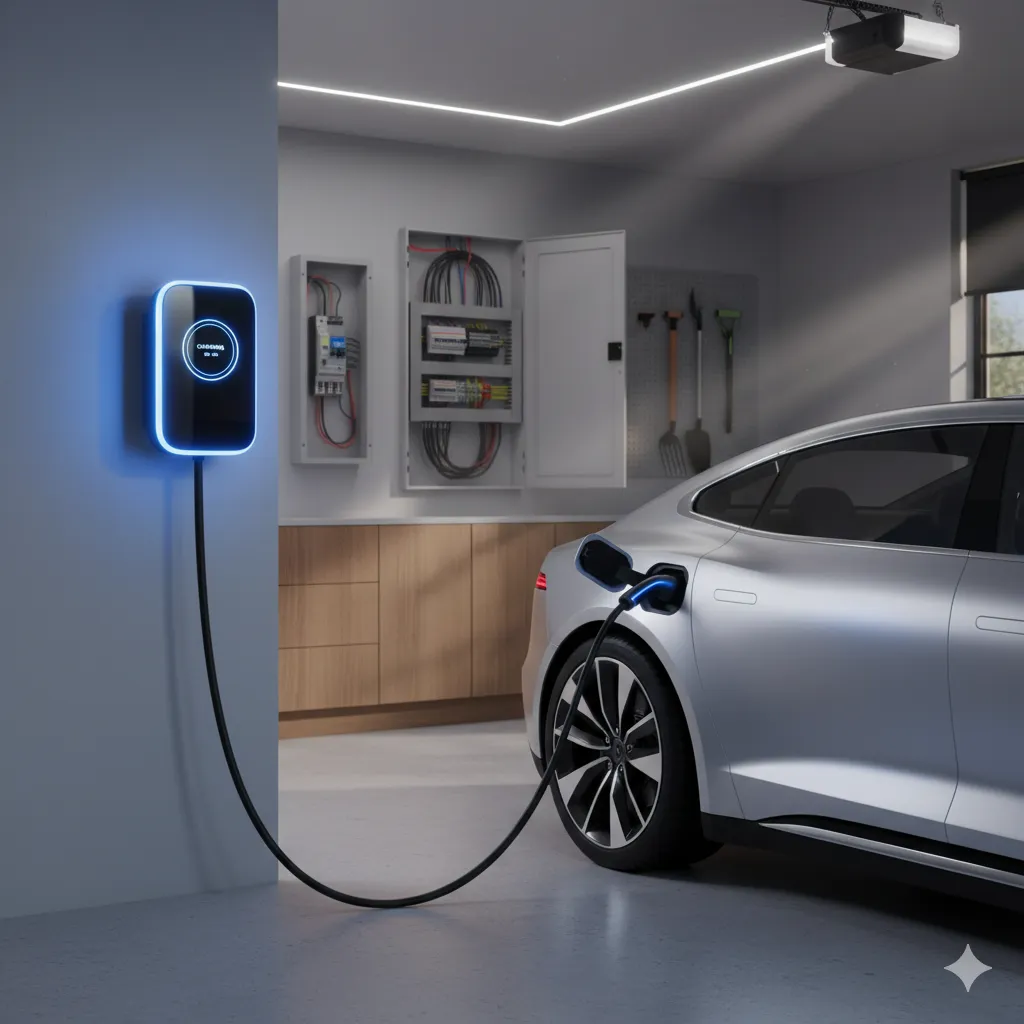
Tethered: The charging cable is permanently attached to the wall unit. Pros: Always ready, less hassle. Cons: Cable length is fixed, can be cumbersome.
-
Untethered: The unit has a standard charging port, and you use a separate cable. Pros: Flexible, easy to replace a damaged cable.
-
-
Smart Features: Look for a home EV charger with Wi-Fi connectivity, which allows for scheduling charges during off-peak (cheaper) hours, tracking energy usage, and receiving over-the-air updates.
H2: 3. Deciding on Installation: DIY vs. Professional
When it comes to high-voltage electrical work, such as a Level 2 EVSE, professional installation is overwhelmingly recommended and often legally required.
Professional Installation (Recommended)
-
Safety and Compliance: A licensed electrician ensures the installation meets all local electrical codes, which is paramount for safety and preventing fire hazards.
-
Permitting: Professionals handle the necessary permits and inspections, saving you the hassle and ensuring your installation is legal and insured.
-
Warranty: Many charger manufacturers require professional installation to validate the product warranty.
DIY Installation (Not Recommended for Level 2)
-
Level 1: You can safely plug in a Level 1 charger yourself.
-
Level 2: Unless you are a certified electrician, attempting a DIY Level 2 installation—which involves running a new 240V circuit and connecting it to your electrical panel—is highly dangerous and can void home insurance policies or lead to significant system damage.
H2: 4. The Installation Process
Once you’ve hired a qualified professional, the process typically follows these steps:
-
Mounting the Charger: The electrician will mount the wall box in the determined optimal location (garage or exterior wall) and ensure the cable can easily reach your car's charging port.
-
Running the Conduit and Wiring: A dedicated 240V wire is run from your electrical panel to the charger location. The length of this cable run is a major factor in your total EV charging installation cost.
-
Breaker Installation: A new, appropriately sized circuit breaker is installed in your main panel.
-
Final Connections and Testing: The charger is wired into the circuit, connections are tightened, and the unit is tested for safety and functionality.
-
Permit Finalization: The local inspector signs off on the work.
Managing Cost and Incentives
The total cost of your home EV charger setup can range widely, generally from $1,000 to over $4,000, depending on the charger unit and the complexity of the electrical work (especially if an electrical panel upgrade is needed).
-
Charger Unit Cost: $300 - $1,200.
-
Installation Labor/Materials: $700 - $2,000 (for a standard install).
-
Major Electrical Upgrade: $2,000 - $4,000+ (if you need a new main panel).
Key Tip: Research federal, state, and local incentives. Many governments and utility companies offer tax credits, rebates, or grants that can significantly offset the EV charging installation cost.
Frequently Asked Questions (FAQs)
Q1: Is a Level 2 home EV charger better than a NEMA 14-50 outlet?
A: A dedicated wall-mounted Level 2 charger (EVSE) is often preferred. While a NEMA 14-50 outlet allows for Level 2 charging via a portable EVSE, the wall unit is generally seen as safer, more aesthetically pleasing, and more robust for permanent daily use. Wall-mounted units also often include smart features, an integrated cable management system, and may be capable of a higher max amperage than what a NEMA 14-50 plug is typically used for.
Q2: How far can the EV charger be from my electrical panel?
A: The distance (cable run) is a primary cost factor. While there is no strict limit, the longer the distance, the more expensive the installation will be due to increased labor and material costs (thicker, heavier-gauge copper wiring may also be required for long runs). Try to choose a parking spot closest to your electrical panel for the most affordable home EV charger setup.
Q3: Do I need a permit to install an EV charging station?
A: Yes, in almost all locations, installing a dedicated 240V circuit for a Level 2 charger requires an electrical permit from your local municipality. A licensed electrician will typically handle this process to ensure all work meets safety and building codes.
Q4: How long does it take to charge an EV at home?
A: Using a Level 2 home EV charger (e.g., 9.6 kW), most EVs can charge from empty to full in about 6 to 12 hours. However, since most EV owners simply top up from 20% to 80% overnight, you'll rarely wait for a full charge. Level 1 charging can take 24 to 50+ hours.
Conclusion: Power Up Your EV Life
Setting up your home EV charger is the best investment you can make in your electric vehicle experience. The convenience and peace of mind from reliable overnight charging far outweigh the upfront EV charging installation cost. While Level 1 offers a simple start, the efficiency of a professionally installed Level 2 charger makes it the definitive choice for modern EV ownership. Prioritize safety, hire a licensed professional for your Level 2 installation, and take advantage of any available incentives. Your electric future starts in your own garage.
e) External Links
-
US Department of Energy's Alternative Fuels Data Center (AFDC): (For regulations and incentives)
https://afdc.energy.gov/ -
National Electrical Code (NEC) information: (For installation standards)
https://www.nfpa.org/codes-and-standards/all-codes-and-standards/list-of-codes-and-standards/detail?code=70 -
A major EV manufacturer's charging page (e.g., Tesla or Rivian): (For equipment examples)
https://www.tesla.com/support/charging


